Showing posts with label diving. Show all posts

Thursday, 11 June 2015

The Ayrshire Coast (Stranraer to Girvan)


The view out to Ailsa Craig.

After exploring around Rockcliffe, we drove out west to the Ayrshire coast. The road from Stranraer to Girvan follows the shore very closely, and has plenty of large parking places which make it really easy to stop and have a look around. I've found this stretch of coastline to be pretty good for seabirds in the past, and it didn't disappoint this time around either!

We stopped at Carleton Bay, close to Lendalfoot.

The bit we stopped in this time was close to Lendalfoot at Carleton Bay - if you follow the signs for the Russian naval memorial you'll find it. Being relatively close to Ailsa Craig, it's also usually a good area to look for gannets, and this time was no exception.

This is a composite image (obviously. No-one gets this lucky!), of a gannet diving just off the beach. It took longer to make than I'd like to admit!

Of course, early summer is also the time when eider ducks breed, and usually hatch their chicks in late May - early June. This is a lot earlier than most of the other seabirds will be hatching their chicks, so if you go to any of the big seabird colonies like the Isle of May or the Farne Islands, they can be easy to miss if you're not on the ball. Anyway, eider ducklings have been on my photography wishlist for a while now, and I was pretty pleased to find that there were quite a few groups of them around this patch of coastline, and pretty delighted to spot the little ducklings in amongst the adults!

Eider ducks fighting about something while a bunch of seals look on in the background. 

So delighted that I didn't actually notice there were a group of common seals basking just offshore until I looked at the photos later on my computer!

An eider duck family settling in for a nap. The duckling is just visible underneath its mum (the brown one).

Eventually, one pair of eiders came into the shore with a chick and settled down in a rather photogenic fashion for a snooze, and I finally got my first decent photo of an entire eider duck family!

An oystercatcher exploring the shore.

Of course, that's not all there was to shoot. A group of shags were making good use of an exposed line of rocks to rest on for the evening, and a rather bold oystercatcher was happy to pose for a few photos before wandering off again!

30 shags sitting on a rock...

Monday, 1 April 2013

Dive Guide: 5th Layby on the Left (Loch Creran)

Site Summary
I don’t know if this site has a real name, but this one is at least descriptive! From the one entrance point you have the choice of diving one of three shallow rocky reefs, all of which are at depths of around 3m - 25m. The off-reef areas are ideal for training on a sandy seafloor, but the real attractions here are the serpulid worms which form beautiful, fragile reefs with their calcareous tubes. For some reason (no-one knows why), this loch is the only site in the world where these worms form large reefs like this and they are well worth seeing.

Type: Shore dive (rocky reef / serpulid reefs)
Depth: 3m-25m 
Tides: None
Suitable for: All diver grades (but good buoyancy essential near serpulid reefs)


Getting there and getting in
From Google Maps. Click to enlarge.

5th Layby on the left site access.

To get to this site, drive north along the A828 towards Fort William, past the Sealife Centre, then turn left at the next roundabout and go under the bridge at the north of Loch Creran. From there (believe it or not!), it’s the 5th passing place on the left. There’s a large parking space there which can fit 4-5 cars. 

Site Access
From the parking bay,  you'll see a path and steps leading down to the shore. It can get a bit slippery underfoot when it's wet or icy so watch out, but basically you just walk straight down the beach and wade in!

Underwater
You have a couple of options for your dives at this site. See below for details. 

Approximate map of the 5th Layby dive site. Click to enlarge.

Once under the water, you have a few choices to make. 

Option 1: If you head straight out from the shore, you'll swim over a sandy seabed to a depth of around 6m where you'll find a small rocky reef. It slopes down quite steeply to a depth of around 10m and at some point someone has tried to build an artificial reef out of old tyres, so you should find those pretty easily. It's a pretty small area though, so you should see most of it within about 20-30 minutes depending on how thoroughly you explore!

Option 2: Keep the line of rocks on your left and follow them out into the water. As you drop down, you'll see a stretch of bedrock on your left which is covered in mussels and horse mussels. Then just keep this rock face on your left and follow it round to about 12-15m. At that point, you'll come to a bend in the rock and you have two more choices: Either follow the rock round to the left a little then double-back over the top of the bedrock slope (option 2a), or head to the right and explore the boulders further out (option 2b).

Option 2a: Head back up and over the bedrock to a depth of about 6m and then search around and you should find a large serpulid reef (approximately 1m high) which is well worth a look, as well as some smaller colonies. They are extremely fragile though, so do not touch them and do NOT swim over them! From there, continue onwards and you'll get back to your entry point.

Option 2b: This is a route I've only ever taken once, so I don't know it as well as the others. But, if you head out towards the right away from the bedrock slope, you'll find yourself in a boulder field which has some nice life on it. Just retrace your steps to get back or follow Option 2a.

Whichever option you choose, you may find you run into a bit of current once you get past the end of the bedrock slope, but it never gets very strong here and you can swim against it quite easily.

Recommended Equipment
Torch

What to See
The serpulid worm reefs are really the main attraction here, but there is a LOT of life on these reefs and they are lovely dives even if you miss the worms. There is a lot of encrusting life over the rock surfaces including plumose anemones, cup corals, Sagartiogeton sp., crabs, fan worms, soft corals and sponges. There’s not usually a lot in the way of fish life, although I’ve seen thornback rays here and quite a few pipefish. In the shallows there are large stands of Ascophylllum seaweeds and horse mussel beds to investigate too which usually have loads of little animals living in amongst them.
Visibility is usually fairly good, but varies a great deal depending on prevailing weather conditions and tide. If you dive here after a period of heavy rain and on an ebb tide the visibility can drop to almost nothing.

On the surface it's pretty common to see seals and otters here too so keep an eye out for those!

Serpulid worm reef at Loch Creran

Greater Pipefish

Close-up of a serpulid worm. The trumpet-shaped operculum is a defining character of this family of worms.

Looking for more? Check out the Dive Guides page!

Thursday, 28 March 2013

Dive Guide: The Caves (Loch Long)

Site Summary
The Caves is a very cool little site in Loch Long which is essentially a steep slope of large boulders with the gaps between them forming 'caves' for marine life, and there are loads of big plumose anemones  and other filter feeding animals all over the rocks. There are quite a lot of fish around this area too though, which makes it a popular fishing spot so fishing line is unfortunately a danger here and carrying a knife or pair of shears is a must. 

Type: Shore dive (rocky reef)
Depth: 0m-33m
Tides: None
Suitable for: Experienced ocean divers+ Good buoyancy required.
Notable hazards: Fishing line (entanglement) / awkward entry & exit.


Getting there and getting in
From Google Maps. Click to enlarge.

There's space for 2 cars to park here, then it's a bit of a scramble down to the water's edge. 

The Caves dive site is about 2 miles south of Arrochar on the A814. There's a small parking place by the side of the road which has enough room for two cars or a minibus to park in, so space is pretty limited. It's a very popular site for sea anglers as well, and they tend to arrive early, so unless you get lucky it would be worthwhile having a Plan B just in case you can't get in here.

Site Access
From the parking place, you have two options to get down to the water's edge, but both are pretty awkward. The first option (1) is to scramble down through the culvert that runs under the road and down that way. The second (2) is to follow the little, narrow path that runs down to the shore from the other side of the bridge. Both options are steep and can be very slippery if it's been raining!

A lot of the shoreline along this part of the loch does look rather similar from the water, so it's definitely worth leaving a marker on the shore if you're not sure if you'll be able to find your way back to the right spot again to get out. The only way out is the way you went in (the rest of the shore here is too steep to climb) so you need to get back to where you started!

Underwater
Approximate underwater map of The Caves dive sites.

Underwater, the site is comprised largely of a steep boulder slope leading down in steps from the surface to a flat, muddy seabed at around 30m-33m depth. It's nice all the way down though, so you can just pick your depth. If you get a day with decent visibility though, there is a stunning view from the bottom of the reef looking back up it towards the surface!

The site is relatively easy to navigate - just keep the slope on your left as you head out and down, then work your way back keeping the slope on your right.

WARNING: There is a LOT of loose fishing tangled in the rocks here so a decent torch and a pair of line cutters are absolutely essential. I know a lot of people who've got snagged here before and it can be extremely dangerous.

Recommended Equipment
Torch (essential)
Line cutters (essential)
Glow stick / flag to mark exit point

Things to See
I've not been to this site in a while, but there used to be lots of fish here, including pollock and other white fish, and it was a good site for dragonets and gurnards too. There are loads of filter-feeding animals too which take advantage of the elevation from the rocks to feed in the current including big plumose anemones, dead-mens fingers and the ubiquitous (for Loch Long!) sealochs anemone. It's also a cool place to see some different starfish like the Bloody Henry


There are a LOT of filter feeders here, making this a beautiful scenic dive site. 

Looking for more? Check out the Dive Guides page!

Wednesday, 27 March 2013

How to: Photograph Birds in Flight

A flying bird is probably one of the most challenging subjects you can try and photograph, and will require an enormous amount of patience to get good results. However, there are a few tricks and techniques that I have found make the process easier, and I hope they will be of some use to you!


Before you go:
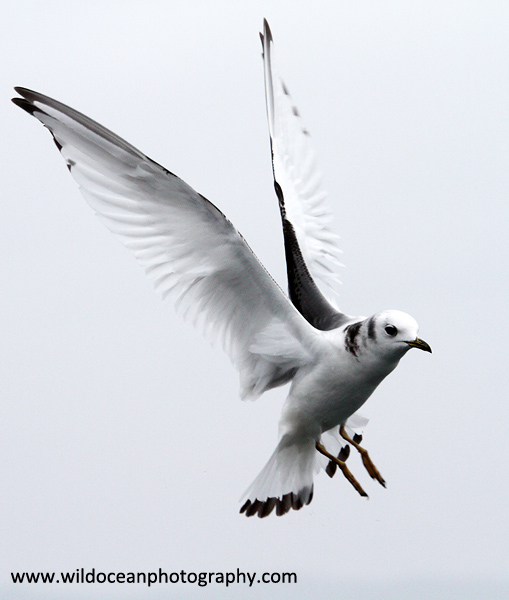
Kittiwakes are great birds to practice on if you can find them as they will fly in a repeating figure-of-eight pattern around the back of a boat as they follow it which makes them really predictable.
  1. Research your subject: You don’t need to predict exactly what species you’ll see on your trip, but it helps to have a rough idea as this will have a bearing on the best kit to take with you - you will need to take a different approach for fast and timid woodland birds compared to ducks at the park for example! Learning as much as you can about the general habits of the bird you want to shoot (e.g. preferred habitat, what it feeds on, what time of day it is most active) will also help you predict what they will do and where they will most likely be when you do get out into the field.

    Knowing the size of the bird, and how close they are likely to come to you are also aspects worth considering when picking your equipment. You may only need a short lens to photograph gulls flying around a seaside town for example, but may require a much longer one to photograph those small finches in a forest. If you know you are only going to have a short time on-site to see some behaviour (e.g. gannets diving at Bass Rock) then spend some time watching videos of it on YouTube or similar so you will have some idea of what to expect.
  2. Set up your kit (and know how to use it!): Birds in flight obviously tend to move very quickly, and you’ll need to be able to adjust your camera settings rapidly to keep up and make sure you get the shot. Which settings you prefer to use are up to you, but I usually set my camera (an affordable and quick Canon 7D) to:
      • Manual Mode: Unless the light levels are changing rapidly, this will make your life MUCH easier as it's one less thing to worry about while you're tracking your subject, particularly if the brightness of the background is very variable.
      • Fast burst shooting: I don't advocate just holding down the shutter button whenever anything happens until your camera buffer fills up, but taking a burst of shots at the peak of the action can often be the difference between a clipped wingtip or a less-attractive posture and a really nice photo.
      • Autofocus on (central point): The central autofocus points are generally more accurate on most (non-professional) camera bodies and I stick to them to ensure a higher 'hit rate' for birds on the move.
      • Shutter speed > 1/1000s: Seriously, this makes all the difference in the world! It doesn't matter if you can hand-hold your camera and long-lens at 1/50s, the pictures WILL look fuzzier than if you get the shutter speed up. If this means you need a higher ISO then use it, but get the speed up as high as you can get it.
      • Aperture: Usually I'll leave this wide open, but I might knock it down to F8 if the autofocus is struggling or if I'm being rolled around a lot like on a boat and I want to make sure the bird's face (especially the eyes) are sharp.
Quick lenses are expensive, but the improvements in auto-focus speeds and smoothness can be worth the cost if you're looking to take your photography more seriously. For most of my wildlife photography, I use the Canon 300mm F4 IS L lens with a 1.4x converter which is absolutlely ideal for what I need. 

In the Field: 
You can use unusual lighting to great effect, but it might not always be what you're looking for! 
  1. Choose your spot: How much you can do this will obviously depend on where you are shooting, and whether you have to stay in a static public hide (as is the case in some nature reserves for example) or whether you have the freedom to move around. Wherever you are though, do make sure and consider your background (is it cluttered? Are there distracting elements?) and the lighting (do you really want your subject to be backlit? Is the target area in bright sunshine or shade?) as well as a good view of the birds you are wanting to photograph. It’s a massive disappointment to find out that you've nailed an in-flight shot, but the shot is ruined by a bit of brightly-coloured litter in the background or too much contrast.
  2. Just Watch: Unless an amazingly rare species pops up or something really unusual is happening, it’s worth spending a bit of time just watching your birds fly. Get used to watching their flight patterns and their general behaviours before you pick up your camera. Most animals display a relatively limited range of behaviours and it's usually possible to learn to predict which actions will precede a fight, take-off, diving or feeding for example. Similarly, different species will fly in very different ways - a heron has a 'lazy', slow flight style, whereas swallows are fast and far more erratic, but will congregate around specific feeding areas. A little bit of patience early on will mean you are in a much better position to predict when and where you are likely to get the shot. Shooting a couple of frames at exactly the right moment is usually better than just keeping your finger on the shutter button taking the 'spray and pray' approach!
  3. Too fast to track? Catch them at a set point: An alternative to tracking a fast bird, or one with an erratic flight path is to manually focus on a particular spot and wait for the bird to enter it. This is much easier if there is a point that the bird is repeatedly flying to (e.g. a food source) so you have something to pre-set your focus on, but with a combination of narrow aperture (for larger depth of field) and a high shutter speed you can get good results (especially if your camera has good high ISO performance!).

    If a bird is flying too fast to catch, try setting your focus manually to a target (in this case , the baby swallow or the bird feeder) and shoot the bird as it enters the frame. A tripod is very helpful to keep the point of focus in exactly the right place, but these examples were both taken handheld.
  4. Be aware of the whole scene: When you are totally focused on a bird in your viewfinder, making sure it is in the frame, in focus and looking lovely, it is very easy to forget the rest of the frame, and what is happening in the background, or to the light levels. If you shoot using one of the semi-automatic settings like aperture or shutter-priority, the camera should make allowances for any changes in the light, but you have to be aware of changes in the background that will confuse it. For example, when shooting seabirds, they quite often swoop and dive around the boats, meaning that the background is constantly changing between a dark blue sea, and a bright, (though usually grey) sky. It is very easy to get the exposure of the bird wrong as a result, and you need to be prepared to keep adjusting the exposure even as you are panning after the bird. This is one of the major reasons I prefer to use manual mode, because it involves a LOT less effort to keep the subject correctly exposed while tracking it!

    Shooting against the dark sea can throw off automatic metering when the bird flies back up and frames itself against the sky. Using manual exposure settings avoids this problem. 
  5. Finally, practice, practice, practice! This is absolutely the most important thing you can do. Once you know your camera and subject, there is nothing better than getting out and practicing with them.
Looking for more photography tips? Check out my other guides on how to compose a great wildlife photo and how to take photographs at sea.


Monday, 25 March 2013

Dive Guide: A-Frames (Loch Long)

Site Summary
This dive site is probably one of the most-used training sites on the west coast, and often becomes very busy at weekends when dive clubs or training centres descend on it from all around the country! The main attractions of the site are the 'A-frames' which are the concrete supports of an old (now very ruined) structure which provide an artificial reef habitat for quite a lot of marine life. Otherwise the site lies over a gently sloping silty, sandy seabed and is ideal for novices and diver training.

Type: Shore dive (rocky / manmade reef)
Depth: 3m-20m
Tides: None
Suitable for: All diver grades
Notable hazards: Currents can be fairly strong below 20-22m.


Getting there and getting in
From Google Maps. Click to enlarge.


There's a good big car park at the A-frames that will accommodate around 15 cars. It will fill up quickly on busy days though! 

The A-frames are found beside the Finnart Oil Terminal on the A814, about 2.5 miles north of Garelochead or 6.5 miles south of Arrochar. There's space to park several cars right beside the site entrance in a relatively large car park, which helps to keep everyone safely away from the main road!

Site Access


Access to the waters edge 

Access to the site is down a short, but narrow little path to the water's edge. It can be a little bit of a scramble though, so watch out. Since it's a single file path, it's polite to give priority to divers who are exiting the water before climbing down yourself. At high tide, the water comes all the way up to the wall, but you can expect a bit of a longer walk if it's low tide. Once you're there, just wade straight in!

Underwater
Approximate map of A-Frames dive site. Click to enlarge.

Once you're in the water, finding your way around is nice and straightforward and essentially requires you to just head straight out from the shore and you'll find plenty of debris and bits of concrete to investigate, including some long concrete 'pillars' which usually have quite a lot of life living underneath them.


Despite this being the one site I've probably dived more often than any other, I think I've only actually got to see the A-Frames themselves maybe a handful of times because I'm usually teaching trainees in shallow water! Still, if you want to find the main frame, it's easiest to use a compass.

Standing at the entrance point, take a bearing towards the white lighthouse on the far shore of the loch (which should be due north). Start your dive and follow your compass, but remember to use your pilotage skills as well (i.e. 'leapfrog' between closer targets that line up on your bearing) because the amount of waste metal amongst the debris can make your compass go a bit weird! 

Keep on that heading until you reach approximately 20m and then start searching around the area if need be until you find it. It is a pretty small target (maybe 5m square) but you should be able to find it ok! I have recently been informed that there are actually four 'A-frames' at this site, so if I manage to find them I'll get you an update.

NOTES: The oil terminal itself is still in use and boats are frequently moored up here. Don't dive past the fence!

The current can be strong here at depths below approximately 20m so watch out for that if you are planning a deeper dive. 

Recommended Equipment
Torch

Compass

Things to See

There is a reasonable amount of marine life to see at the A-frames if you're able to go and look for it, though I don't think there's anything particularly rare. There are always shrimp underneath the concrete pillars, and you can also usually see the occasional plumose anemone, dead man's fingers or peacock fan worms on the more elevated parts of the structures. There are loads of crabs and starfish and plenty of 'buckie' whelks as well which you might see mating or laying eggs if you go early in the year. On the A-frames themselves you'll see a lot more encrusting filter feeders like the soft corals and fan worms and it's definitely the highlight of the dive if you can find it!

Visibility here is extremely variable, largely due to the high numbers of divers who use the site at weekends.

Buckie whelks (Buccinum undatum) laying eggs (Nov 2012)

Velvet swimmer crab (Necora puber)

A variety of organisms colonise the concrete blocks around the site, particularly tunicates.

Hermit crab (Pandalus bernhardus)

Looking for more? Check out the Dive Guides page!

Sunday, 24 March 2013

Dive Guide: Conger Alley (Loch Long)

Site Summary
Conger Alley is shore dive I've done a LOT over the years! It's made up of two rocky reefs over a gently sloping sandy seabed and there's usually a decent amount of marine life to see including conger eels if you're lucky. Situated near the north end of Loch Long, it's sheltered from a lot of bad weather by the surrounding hills and doesn't get much in the way of currents which makes it an ideal site for novices or diver training. 

Type: Shore dive (rocky reef)
Depth: 6m-30m 
Tides: None
Suitable for: All diver grades
Notable hazards: Traffic on A83

Getting there and getting in
From Google Maps. Click to enlarge.
If you don't park at the 'proper' parking place, you can fit 3-4 cars at the side of the road here in the mud. The site entrance is marked with the arrow.

Conger Alley sits right on the side of the A83, just 2.5 miles north of Arrochar. There's space to park several cars about 500m away in a large, tarmaced parking place, or if there aren't too many of you it's possible to park at the side of the road in the mud just beside the Goldberry Cottage B&B. It's a bit of a squeeze there though and you will be very close to the (very fast) main road.

WARNING! The traffic on this part of the A83 goes VERY fast as this stretch is one of the only good places to overtake for several miles. As such, cars are often travelling on the wrong side of the road so be careful! Lorries and heavy traffic are also a common feature.

Site Access
Access is very easy. The path is found directly opposite the white cottage on the side of the road.

Wherever you decide to park, there is a small pavement on the opposite side of the road where you can set up your kit and which will get you safely to the site itself. Access to the shore is via a small path directly opposite Goldberry Cottage B&B.

Photo courtesy of Charlotte Hopkins.

It's a pretty good option when the weather's awful too since the A83 is usually open at least as far as Arrochar. 

The path can be a little slippery when it's wet, but it's in pretty good condition and once you're on the beach it's an easy walk to the water. Just follow the line of boulders and wade in.

Underwater

Approximate map of Conger Alley dive site. 

Once you're in the water, finding the reef is nice and straightforward. Heading out from the shore, head diagonally left away from the shore down until you get to around 10-15m water depth. At this point, don't go any deeper and continue along the slope for a few minutes until you reach the reef. It is a relatively long and boring swim over a fairly featureless sandy bottom, but as long as you're at the correct depth you will definitely reach the shallow reef.

TOP TIP: Watch out for sealochs anemones as you head towards the reef. The boulders at Conger Alley are covered in them, and you'll see them start to appear on the seabed as you get closer to the reef.

When you get to Conger Alley itself, you have the choice of two reefs to explore. I've never dived the 'deep' reef myself, but you'll find it by heading downslope from the 'shallow' reef to a depth of around 25-30m or so depending on the tide. I believe there are usually more conger eels at the deeper reef so if you're qualified and happy with the depth it might be worth a look.

Otherwise, you can carry on across the shallow reef. It's not particularly large, so it's perfectly possible to work your way across it two or three times as you gradually head shallower.

Recommended Equipment
Torch

Things to See

There is quite a lot of marine life to see at Conger Alley, including quite a few species fish (particularly ballan wrasse, conger eels and lots of leopard gobies) though you often need to get right down to the seabed and look under the rocks to see them. Sealochs anemones cover virtually every boulder surface and there are also a few sponges and the occasional plumose anemone as well as all the usual velvet swimmer, harbour, hermit and some large edible crabs. Cerianthids and green crabs are common over the sand.


Baby common starfish on a tunicate

Common starfish

Conger eels are usually spotted hiding well under the boulders. They can sometimes be coaxed a little way out by waving your torch in front of (not at) them, but keep your fingers to yourself!

Sealochs anemones are virtually everywhere! You'll start seeing them the closer you get to the reef. 

There's a lot of weed to plough through in the shallows if you miss the exit! 

Looking for more? Check out the Dive Guides page!

Saturday, 2 March 2013

Porpoises on the Clyde

I read somewhere once that owning a RIB was basically the same as owning a large fibreglass hole in the ocean into which you throw money. I will add time to that as well, since our boat is pretty old and therefore in constant need of some sort of repair and because I know nothing about RIB maintenance that I haven't learned through tortuous trial-and-error. Some days, owning a RIB is an utter pain in the ass.

But then you get days like today and it all feels worthwhile.

Trail Island in the Clyde.

Today I took four experienced divers out onto the Clyde to explore around Trail Island by Little Cumbrae since it's not a site we've dived much before with the University club even though it's virtually on our doorstep. Unfortunately, issues with a dodgy neck kept me out of the water myself, but whatever - I still got to take my RIB out for a spin, so who cares!

I couldn't really ask for much more out of a Saturday afternoon! 

Anyway, I dropped the guys in for a thoroughly relaxed and uneventful dive along the cliff-face and then left them to it while I just enjoyed being back at sea (and doing a spot of high-speed driving practice because frankly if you've got a boat to yourself with a 90HP engine on the back it would be rude not to!). A short 45 minutes later, the divers came back happy but cold and with plenty of decent site information we can add to our list for the Uni club so we decided to call it a day and head back home for some lunch. And that's when it all got rather exciting.

Just as we were reached the channel between the two Cumbraes, I spotted a couple of porpoise near where we'd seen some earlier in the day and slowed down to approach them. Porpoise are usually shy and solitary creatures so I wasn't holding out much hope of getting very close, but I slowly trundled us towards the area they seemed to be congregating in anyway and stopped the boat.

Porpoise!

Within a couple of minutes it was obvious that we hadn't just found a couple of porpoise, and even more obvious that we must have stumbled into a feeding spot because we were suddenly surrounded by about 20 of them, all swimming actively and (strangely enough for porpoise) happily circling the boat! I've worked as a wildlife guide before in one of the UK's porpoise hotspots, but I've never seen as many as there were today and never so close! By the time I remembered I'd brought my camera, they'd been with us for a good 10-15 minutes and were showing no signs of being disturbed by our presence which was just awesome. Photography was virtually impossible because the glare on water meant you couldn't see them below the surface to track when they'd appear, but I did manage to get this one shot. It doesn't do the event any justice at all, but at least you can see how close they were to us!

I reckon if every Saturday could be like this, I'd would never have anything to complain about :)

Saturday, 23 June 2012

Review: Canon 7D

So I figured that since I wrote a whole post yesterday on my new Canon 17-40mm lens, this is probably as good an opportunity as any to write in a bit more detail about some of my other gear, starting with my photography kit! Today's review is on the Canon 7D DSLR body.

The Canon 7D
Canon 7D with 300mm F4 IS L lens + 1.4x teleconverter.

The Canon 7D was released a couple of years ago now back in Autumn 2009 effectively as a 'sports' alternative to the Canon 5D Mk2 which was released about the same time. With the 5D Mk2 offering a massive number of megapixels (22.2), a HUGE ISO range (up to 25600) and the same amazing image quality as its predecessor, the 7D had a lot to live up to. By comparison, the 7D has (slightly) fewer megapixels (18MP), a (1.6x) crop sensor, and worse ISO performance. But then again, none of that really matters because this camera is built for speed.

You can read all about the specifications of this camera elsewhere, but the most interesting updates from my point of view when I bought it were the really fast and accurate autofocus (said to rival the AF of the much-adored Canon 1D Mk II) and the whopping 10 frames-per-second (fps) continuous shooting rate. The accuracy of the autofocus was something I was keen to improve at that point, as I'd been shooting with a Canon 40D for a while by then and was finding it frustratingly slow at times, particularly when trying to shoot birds in the chaos that follows behind fishing boats.

First Impressions


I spend two days looking at specks of flying drool and wondering why they weren't sharp enough. Sigh.

My first impressions of the 7D when I bought it two years ago were that it a) sometimes took awesome photos and b) was a far more technical camera than I had been used to up to that point. I spent a few weeks with the manual and testing it out at Caerlaverock WWT reserve on geese and on my (rather quick) dog and his frisbee. Then I spent another few days driving myself crazy looking at 100% crops of the images I was taking and wondering why they weren't quite up to the standards I was expecting. After testing the sharpness of my lenses (all are spot on) and deciding that it probably wasn't the 7D body (results were inconsistent), it turned out to be user error (I was basically using too slow a shutter speed for too-fast subjects!). Interestingly though, I'd written off a lot of soft images from the 400D or 40D as being the fault of the camera and it took the 7D to make me really reassess the way I had been shooting and how to really get the most out of a camera. It probably means I was always a bit unfair on the other cameras I'd had, but it forced me to become a better photographer and to think a lot more about what I was actually doing when I went out to shoot.

Later Impressions
After that rather steep learning curve at the start, the 7D has never disappointed. The AF isn't perfect, and it will miss subjects, particularly when there's low contrast (e.g. shooting grey birds on a cloudy, grey day) or if they're moving fast over a close backdrop (e.g. low flying over the sea) but when it gets a subject (and it will catch on quickly!) it will definitely catch it. One problem I had with the 40D was that it would partially focus on subjects fairly often, but the 7D doesn't do this nearly as much and things tend to be either in focus or completely missed. The 10 fps is also very handy, and although using long bursts will eat up the processing power within a second or two, it can make for some cool time-lapse sequences and if used sparingly, can often make the difference between getting a usable or a completely useless photograph. 

Shot at ISO6400 in the middle of the night with only a ship's light to illuminate the sea. It's not brilliant, but perfectly acceptable as an ID photo.

The ISO performance on this camera is pretty good too. At anything much above about 400ISO, you do really start to notice the graininess coming into the images, which is a bit of a shame but probably fairly inevitable given the number of MP squeezed onto the sensor. Image quality in general though is excellent, and I must admit that the 18MP resolution means you can crop an image in pretty far and still maintain a good resolution image, which is a nice cheat if you can't afford a super-zoom (I can't).

After two years of trying I was finally able to get this shot!

One of the main reasons I wanted a camera upgrade was so I could get a decent photograph of a gannet diving into the water. For whatever reason, I'd never managed to get that shot before with my old gear, but the hit rate went up massively with the 7D, so I'm guessing it wasn't entirely down to human error! Gannets can reach 60mph when they hit the surface of the sea, so they present a pretty big challenge to spot, focus on, track and shoot. Thanks to this camera (and plenty of practice), I was able to FINALLY get the result I wanted!

Environmental Sealing
Shooting a timelapse series of our journey down the Clyde at the start of our last research cruise. My camera's under the hat and the timer is in the rucksack. It was cold.

I thought this might deserve special mention since I've probably done just about everything to this camera short of dropping it or drowning it (and it's come close to the latter). In the two years I've owned my 7D I've taken it out on about a dozen fishing boats, covered it in mud, salt, fish slime and water and battered it off several walls, floors and railings, and in all that time it's never had any kind of issue (not even a dusty sensor). It undoubtedly helps that I almost exclusively use weather-sealed lenses when I'm outdoors but it's pretty reassuring. After all, what's the point in owning something if you can't use it when you want to?

Stuff I never thought I'd use
As you've probably noticed, I've really only talked about the AF and the fps so far, because those were the things I bought the camera for, but there are a ton of other features that I've slowly started to use, even though I never thought I'd bother with them. The HD video is one of those features, and it's still not something I'm using a lot. It has been good fun to play with though and if nothing else is enough to satisfy my curiosity about whether video is something I want to get into a bit more. I wish it had continuous autofocus, but aside from that, seems to be pretty nice!

The other feature I've started using more is the live viewfinder on the back. Not being a macro photographer, I've never really bothered with this as a feature as I prefer using the 'normal' viewfinder (I'm oldskool like that!), but it certainly has it's uses and I've found myself using it increasingly to frame shots at awkward camera angles which is handy. I also understand why people love adjustable live viewfinders!

Summary
Before I bought this camera I used to spend a long time hopelessly lusting after cameras like the 1D MKIII or IV wishing I had something that would just shoot a bit faster or grab subjects a bit quicker. Since owning the 7D I don't think I've bothered to look at any other cameras - this one is still going strong and it provides everything I need in a camera body. The crop sensor, high resolution and really fast speeds all combine to make it an excellent sports or wildlife camera. You don't get quite the resolution or the image quality that you can get with a (full frame) 5D MKII or III, so if those things are important to you, then the 7D might not be the camera you want. If you're after something reliable, super-fast and affordable for shooting fast-moving things then you could certainly do far, far worse.